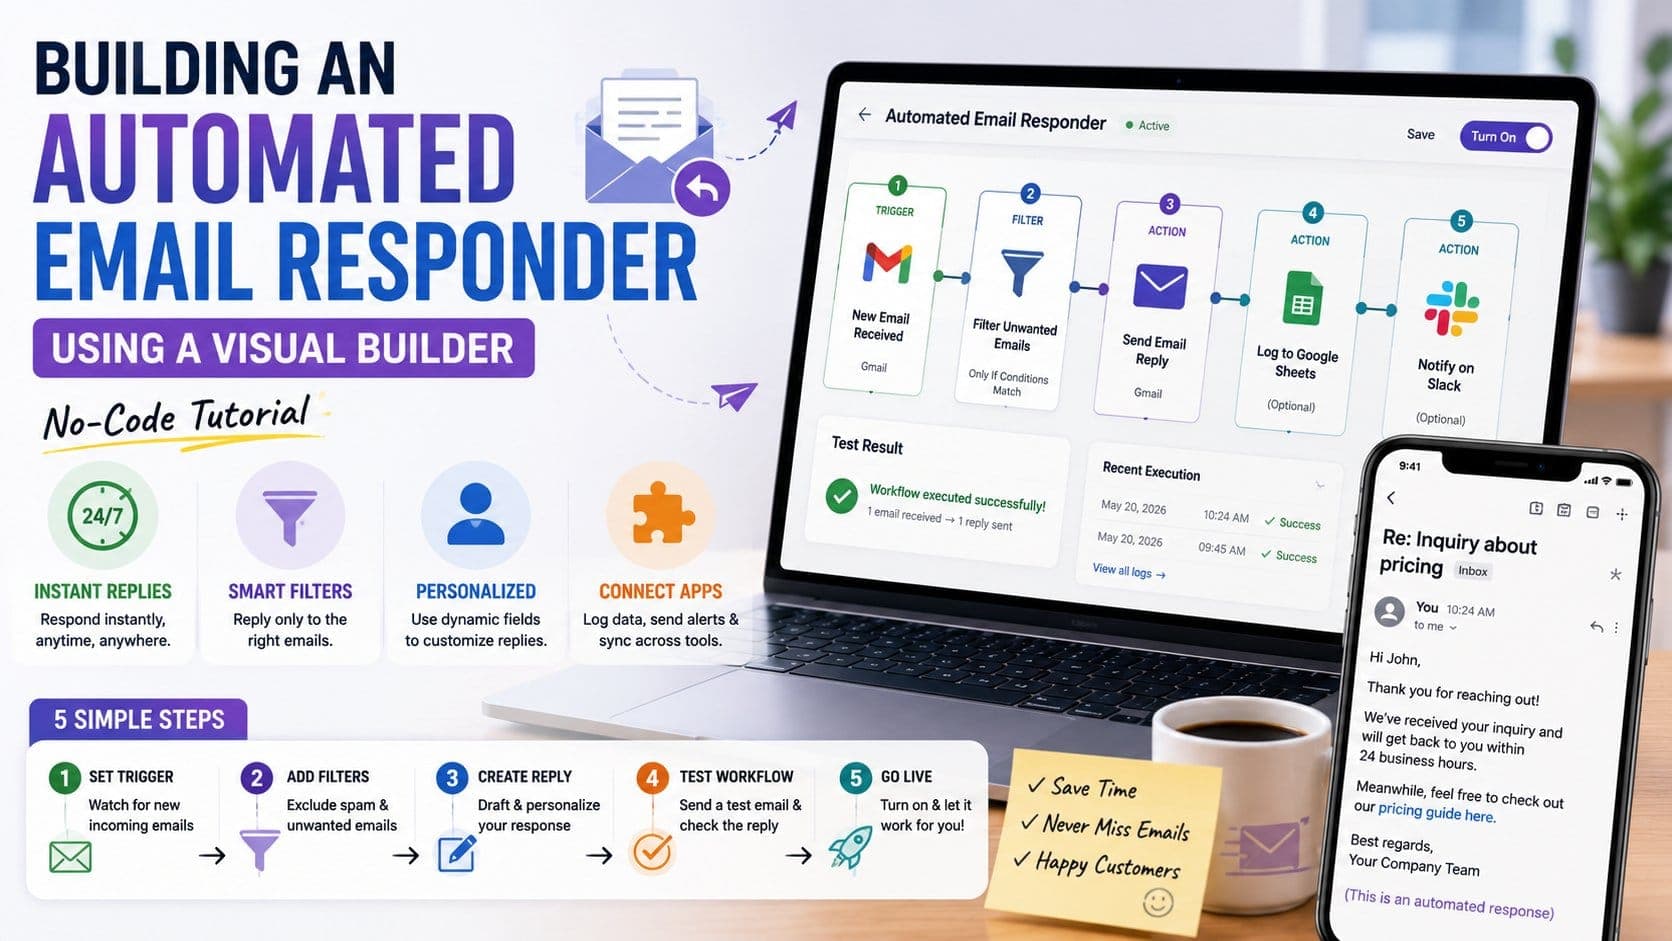
A customized automated email responder helps you send elaborate responses to potential clients when you are out of office. These are instant 24/7 responses that do not need human intervention to be sent at the right time. You can customize responses for each client and even connect your emails to other apps. It is easier than ever to build a customized automated email responder in 2026 with the introduction of various AI tools. You do not need to be an expert in coding to build the application.
Here is how you can build an automated email responder using a visual builder:
Why Build an Automated Email Responder (Without Writing Code)?
If you build an automated email responder, then you will get a massive upgrade in your inbox. Unlike traditional email applications like Gmail, which offer only one-word auto-responders, you will be able to customize your message to suit your needs.
Visual no-code automation platforms resolve these challenges by providing:
- Instant, 24/7 Response Capabilities: Your workflow runs continuously in the background, acknowledging incoming requests instantly regardless of time zone, weekends, or business hours.
- Granular Filtering Control: Instead of replying to every message, a visual workflow allows you to evaluate email parameters—such as subject lines, sender domain, body copy, and recipient headers—before triggering a reply.
- Dynamic Content Personalization: You can parse information from the incoming email (like the sender’s name, submission date, or specific query details) and inject those values directly into your reply template.
- Cross-App Connectivity: Once your responder works, you can easily extend it. For example, you can log incoming emails into a Google Sheet, send a notification to a Slack channel, or create a contact in a CRM—all inside the same visual interface.
Prerequisites and Tool Setup
To follow along with this tutorial, gather the following requirements before building:
- An Active Email Provider: A business or personal email account via Gmail, Google Workspace, Microsoft Outlook, or an IMAP/SMTP mail server.
- A Visual No-Code Automation Builder: Create a free account on any major visual workflow platform. Popular choices include:
- Zapier: Best for simple setups and quick third-party integrations.
- Make (formerly Integromat): Ideal for granular visual routing, advanced array processing, and cost-effective operations.
- n8n: A flexible option for creators seeking self-hosted or developer-friendly visual control.
- A Secondary Test Email Account: An alternative email address (such as a personal address or a secondary account) to send test messages into your system without triggering self-reply conflicts.
Once logged into your visual automation builder, create a new, blank workflow canvas (often called a "Zap", "Scenario", or "Workflow").
Step 1: Define Your Automation Trigger
Every automated workflow works on a trigger, so you first need to define an automation trigger for it to go into action.
- Add the Initial Node: Click the central plus (+) icon or trigger box on your visual canvas and select your email service (e.g., Gmail, Microsoft Outlook, or Email by Zapier/Make).
- Choose the Event: Select "New Email Received" or "Watch Emails".
- Authenticate Your Connection: Click Connect Account and complete the secure OAuth sign-in to grant the visual builder read access to your email account.
- Define Folder Monitoring: Specify which folder or label the trigger should monitor. In most cases, select Inbox.
- Fetch Sample Data: Run a test on the trigger node. Send a real message from your secondary test email to your primary inbox, then click "Fetch Data" or "Test Trigger". The builder will display the incoming email payload, showing variables such as Sender Email, Sender Name, Subject, and Body Text.
Step 2: Apply Filters and Branching Logic
One of the biggest mistakes creators make with email automations is failing to filter incoming traffic. Sending automated replies to auto-generated receipts, marketing updates, or spam emails can harm your domain reputation and create infinite reply loops.
- Add a Filter Step: Place a filter module immediately after your trigger node.
- Configure Exclusion Rules:
- Address Filtering: Add a condition that stops execution if the sender’s email address contains terms like no-reply, noreply, do-not-reply, or mailer-daemon.
- Domain Filtering: Exclude your own email address or domain to prevent the responder from replying to messages sent by your team.
- Configure Inclusion Rules:
- Keyword Matching: If this responder is intended for specific inquiries (e.g., sales quotes), set the filter to run only if the subject line or email body contains target keywords like Inquiry, Pricing, or Support.
- Prevent Unlimited Loops: Ensure your filter checks for standard email auto-reply headers (e.g., Auto-Submitted or Precedence: bulk) if your builder supports header inspection.
Step 3: Draft and Dynamic-Map the Email Response
With logic filters in place, add the action node that builds and sends the automated reply.
- Add an Action Module: Search for your email provider again, but this time select the action "Send Email" or "Create Reply".
- Map Recipient Parameters:
- In the To / Recipient field, click to open the dynamic variable picker.
- Select the Sender Email Address value output by your initial trigger node. Do not type a hardcoded email address here.
- Set the Subject Line:
- Match standard email conventions by prepending Re: to the incoming subject line: Re: {{Trigger.Subject}}. This keeps your response within the customer's existing email thread.
- Draft the Dynamic Body Content: Combine fixed messaging with dynamic variables pulled from the trigger step.
Step 4: Test Your Workflow with Sample Data
Never publish an automated workflow without executing a full end-to-end test.
- Send a Live Sample Email: From your test email address, send a message to your monitored inbox. Use a subject line that intentionally passes your filter criteria (e.g., Inquiry about standard pricing).
- Run the Scenario Manually: Click "Run Once" or "Test Step" inside your visual builder.
- Inspect Execution Logs:
- Trigger Node: Confirm that the test message was pulled in with all parameters intact.
- Filter Node: Verify that the logic evaluated to True / Pass.
- Action Node: Ensure the status returns a successful response (e.g., status code 200 or Success).
- Check the Recipient Inbox: Open your test email inbox to verify that the auto-reply arrived. Check for any unparsed code blocks, missing line breaks, or unpopulated variable tags like {{SenderFirstName}}.
Step 5: Turn On and Monitor Your Auto-Responder
Once your test email delivers cleanly, your automated system is ready to launch into production.
- Activate the Workflow: Locate the main switch on your visual builder dashboard and toggle it from Off/Draft to On/Active.
- Configure Execution Frequency: Depending on your plan, set your polling interval (e.g., real-time webhooks or scheduled polling every 5 to 15 minutes).
- Set Up Failure Alerts: Turn on system notification alerts inside your automation builder, so you receive a notification (via email or Slack) if an API token expires or a network timeout occurs.
- Conduct Regular Audits: Check your workflow’s history log once a week after launch. Confirm that legitimate inquiries are passing through and that unwanted spam messages are being filtered out correctly.
Best Practices & Pitfalls to Avoid
To maintain a clean inbox and provide a great user experience through your tool, you need to follow the following guidelines:
- Transparent Communication: If you are using an automated email response to respond, you need to put an acknowledgement at the end of your email mentioning clearly that this is an automated response.
- Adhere to Provider Quotas: Standard Gmail and Outlook accounts carry daily outbound email sending limits (typically 500 to 2,000 emails per day). If you expect higher volumes, connect a transactional mail service like SendGrid, Mailgun, or Postmark to your workflow builder.
- Provide Fallback Paths: Always include links to self-service resources, documentation, or alternative emergency contact numbers inside your template so urgent client issues are not delayed.
Building an automated email responder is easier than ever because of AI tools available on the internet right now. This helps you send customized responses to emails when you are out of office.
 Trending
 Rupsa Chakrabarti
 7 min read